
Interior Painting Prep Checklist for a Cleaner, Faster Paint Job
We have seen it many times. Someone grabs a roller, opens a paint can, and starts right away. At first, it feels quick and productive. But soon, uneven coverage, dust marks, and rough patches start to show. The problem is not the paint. It is the prep. A clean and smooth finish always starts before the first coat goes on. When the prep is done right, the whole job becomes faster, cleaner, and easier. This blog provides a simple interior paint checklist and the process we follow to get consistent results every time.
Key Takeaways
Before we get into the steps, here are a few important points to keep in mind when looking for an interior paint checklist:
- Most of the time spent on a good paint job happens before painting begins, and that is what controls the final result.
- Paint bonds better when walls are free from dust, grease, and residue.
- Minor repairs improve how smooth and even the finished wall looks.
- Protecting floors and planning ahead reduces cleanup and delays.
- Rushing into painting often leads to rework and shorter paint life, something we avoid as professional interior and exterior house painters.
Interior Paint Checklist That Makes Painting Easier
This checklist is based on what actually works on real jobs. Each step builds on the previous one, so following the order makes the process smoother.
1. Clear the Room for Better Access and Safer Work
Before starting, we prepare the space to keep work smooth and safe, which is a key part of any interior paint checklist.
Here is what we handle first:
- Move furniture out or center it.
- Remove wall décor and curtains.
- Take off outlet covers and plates.
- Keep floors clear for movement.
When the room is open, you can move freely and focus on painting without having to stop to shift things around.
2. Clean Walls to Remove Dust, Grease, and Build-Up
This is one of the most overlooked parts of an interior paint checklist. Walls may look clean, but they often harbor dust, oils, and other residues that affect paint adhesion.
- We focus on high-contact areas:
- Kitchen walls with grease buildup.
- Hallways and entry points with frequent touch.
- Areas around switches and door frames.
Using a proper cleaner helps remove residue so the paint applies evenly and holds better.
3. Fix Surface Damage Before You Start Painting
Paint highlights imperfections instead of hiding them. That is why we handle repairs before moving forward.
We take care of:
- Nail holes and small dents.
- Fine drywall cracks.
- Minor surface wear.
Let repairs dry fully so the wall looks smooth and even after painting.
4. Sand Surfaces for a Smooth and Even Base
Sanding helps create a surface that allows paint to be applied evenly and hold better. It is a step that adds real value to an interior paint checklist.
We use light sanding to:
- Smooth out patched areas.
- Reduce rough spots.
- Remove slight sheen from older paint.
This step improves coverage and yields a cleaner finish, which is why reliable, affordable house painters include sanding in their prep routine.
5. Use Primer Where It Is Actually Needed
Primer is not required everywhere, but it is important in specific areas.
We apply primer in cases like:
- Stains that can bleed through paint.
- Fresh repairs that need sealing.
- Dark to light color changes.
Using primer in the right spots improves coverage and keeps the finish even.
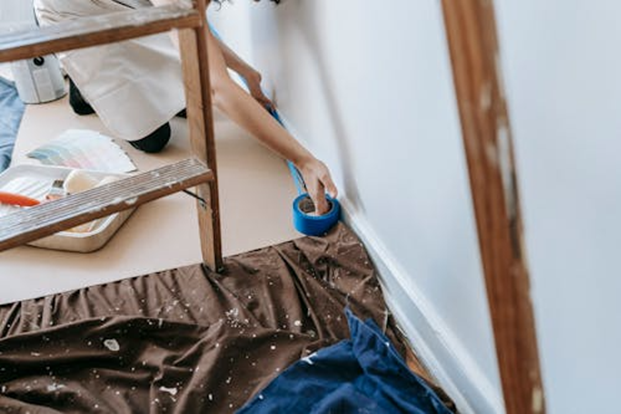
6. Protect Floors, Edges, and Fixtures Before Painting
Before opening any paint, we make sure everything is protected. This step keeps the workspace controlled, which is a key outcome of following an interior paint checklist.
We set up protection using:
- Drop cloths to cover floors
- Painter’s tape for sharp edges
- Covers for furniture and fixtures
Proper protection reduces cleanup time and keeps lines sharp and neat.
7. Set Up Proper Lighting and Airflow in the Room
Lighting and airflow help control how paint looks and dries.
We make sure to:
- Use bright lighting to spot missed areas.
- Keep windows open for steady airflow.
- Maintain ventilation for even drying.
This setup supports a consistent finish and a comfortable work environment.
8. Plan the Painting Order Before You Begin
A clear order keeps the painting process smooth and avoids rework. Planning ahead is what ties the entire interior paint checklist together.
We follow a simple sequence:
- Start with the ceiling
- Move to the walls
- Finish with trim and details
This order keeps surfaces clean and helps maintain steady progress.
Signs Your Paint Prep Is Not Done Right
Even after prep, there are signs that something may have been missed. Catching these early can save time and effort later.
Look out for these indicators:
- The wall feels uneven when you run your hand across it.
- Fine dust is visible under direct light.
- Tape is lifting or not sealing along edges.
- Repaired spots look different from the rest of the wall.
- Paint does not spread smoothly during a test roll.
If you notice any of these, it is better to fix them before moving forward. It helps avoid problems after the paint dries.
Conclusion
Good prep is what separates an average paint job from one that looks clean and holds up over time. Following a well-planned interior paint checklist keeps the process organized, reduces mess, and helps avoid common issues later. We follow this same approach on every project to ensure consistent results.
If you have questions or need help getting started, we are always available to guide you and provide a free estimate.
FAQs
- How long should interior paint prep take?
Prep time depends on the condition of the room. It can take as long as painting, especially if cleaning, repairs, and sanding are needed. Proper prep helps avoid delays later.
- Do professionals follow an interior paint checklist?
Yes, home painting services professionals follow a structured checklist on every project. It helps maintain quality, ensures proper prep, and delivers consistent results across different spaces.
- Do walls really need to be cleaned before painting?
Yes. Dust, grease, and other residues can prevent paint from adhering properly. Cleaning ensures better adhesion and a smoother, longer-lasting finish.
- Can I skip sanding if the wall looks smooth?
Even if a wall looks smooth, light sanding helps create a better surface for paint to stick to. It also removes minor imperfections that are not always visible. Skipping this step can lead to uneven coverage in certain areas.
- What is the most common mistake during paint prep?
The biggest mistake is skipping prep steps. Rushing into painting without cleaning or repairs often results in poor work and rework. A full-service painting company, like ours, focuses on prep first to avoid these issues.

Leave a Reply